MIDI Xylophone
The goal of this project was to build a MIDI-controlled instrument using an Arduino. My group designed and built the device from the ground up, including a custom PCB and wooden enclosure.
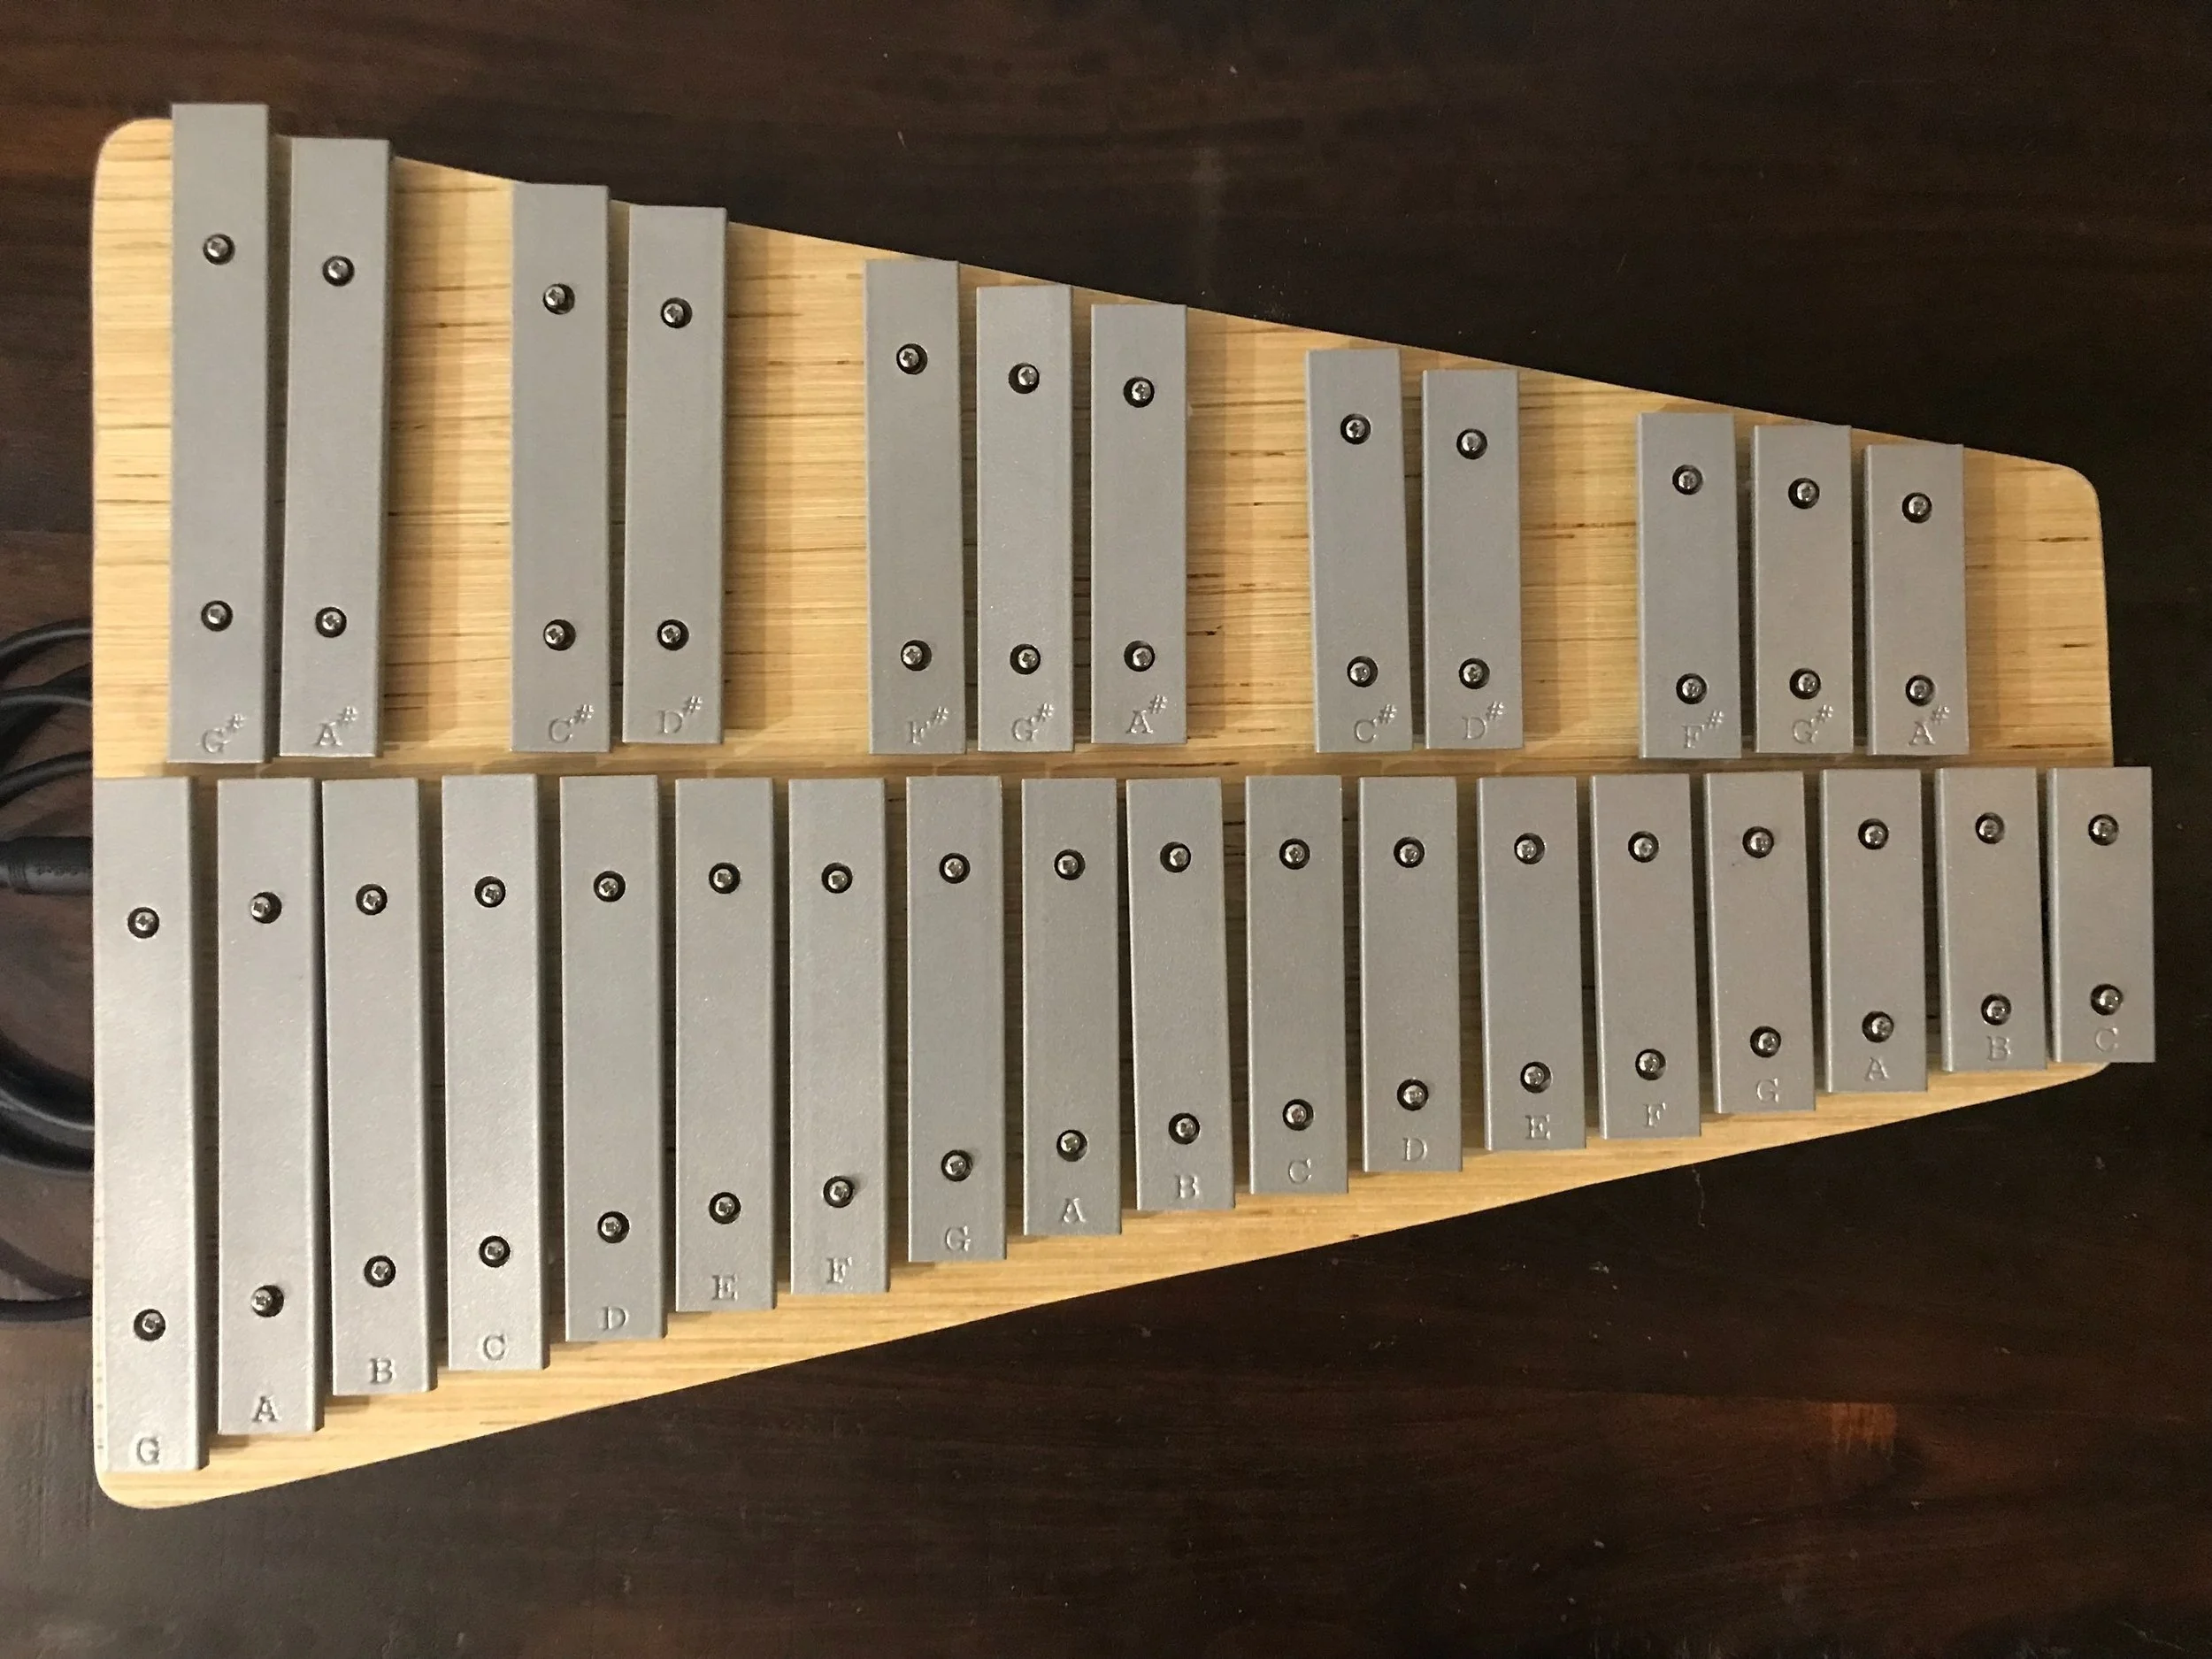
This instrument works by receiving serial MIDI data, and providing power to a solenoid when its corresponding MIDI note is played. Users connect 5-12v DC to the power plug, and a 5 pin DIN cable to the MIDI input.
Note values above and below the instruments range are shifted to be playable, and sustained notes are played only as short, percussive notes. This is to prevent the solenoid from dampening the key by remaining in the extended position.
My role
As the leader of this project, I led our group in weekly prototyping and design sessions using breadboards.
I designed and built several prototype solenoids, as well as the plywood enclosure. As a team, we went through countless iterations of Arduino IDE code and PCB schematic.
My prior experience with MIDI arrangement and Arduino programming was useful in creating the design criteria at the start of the project.
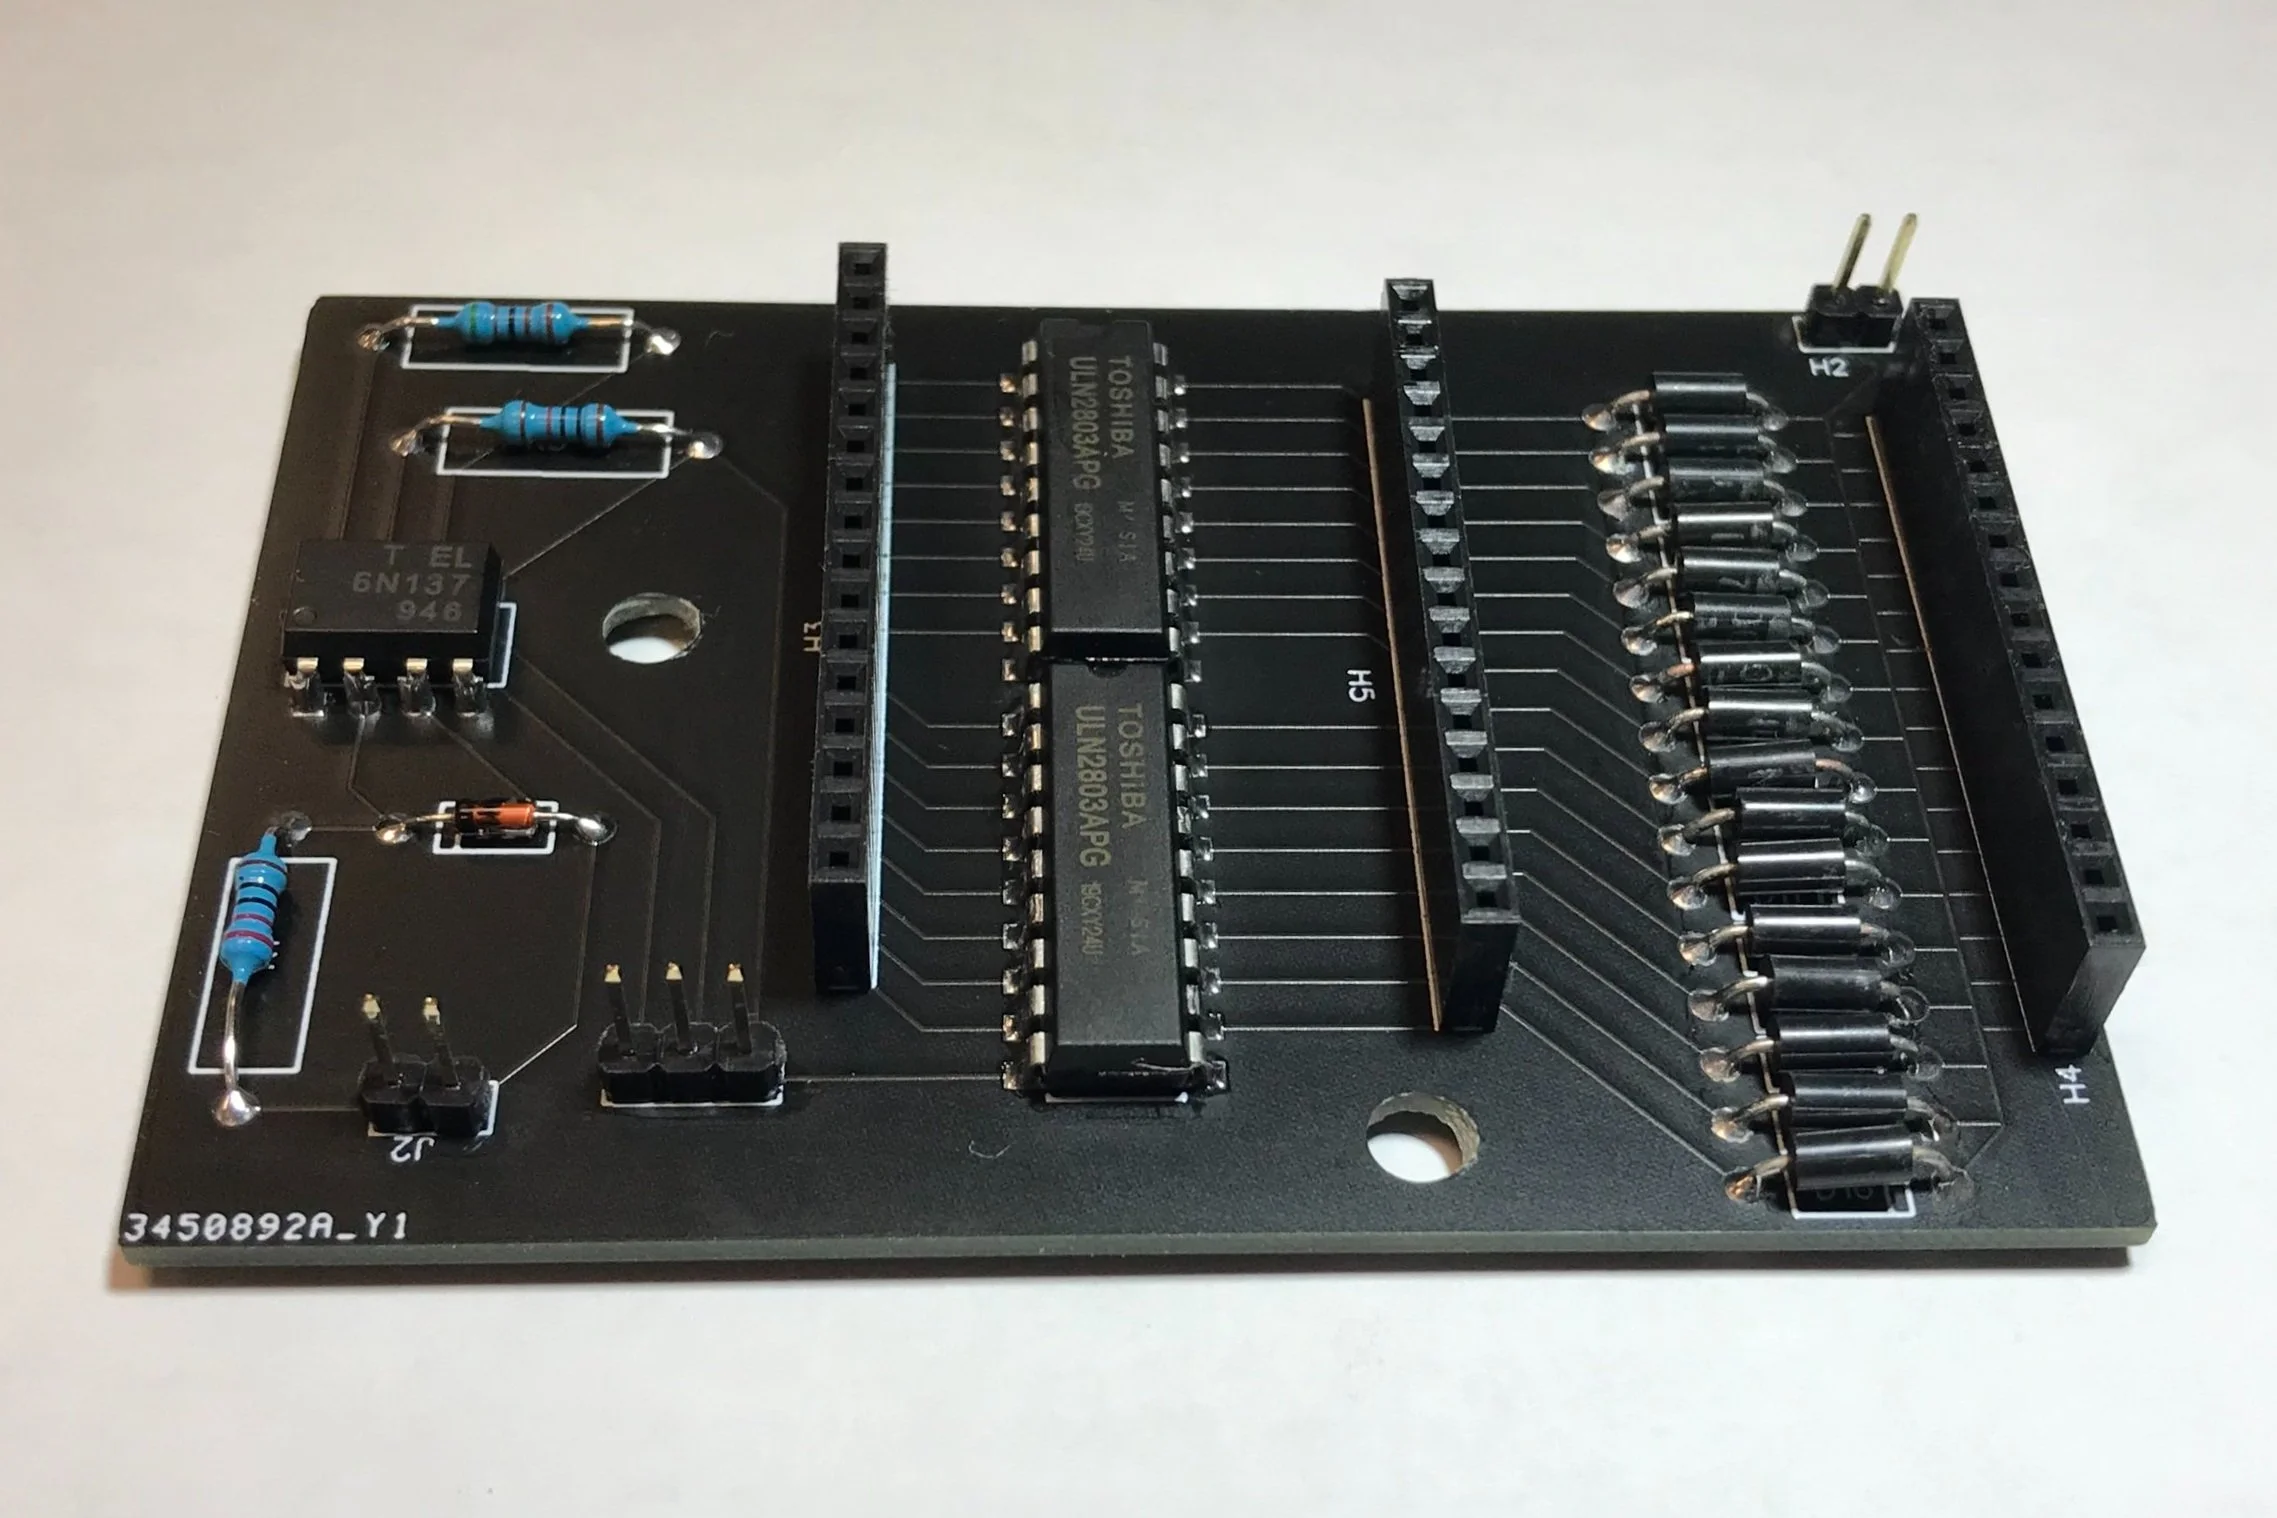
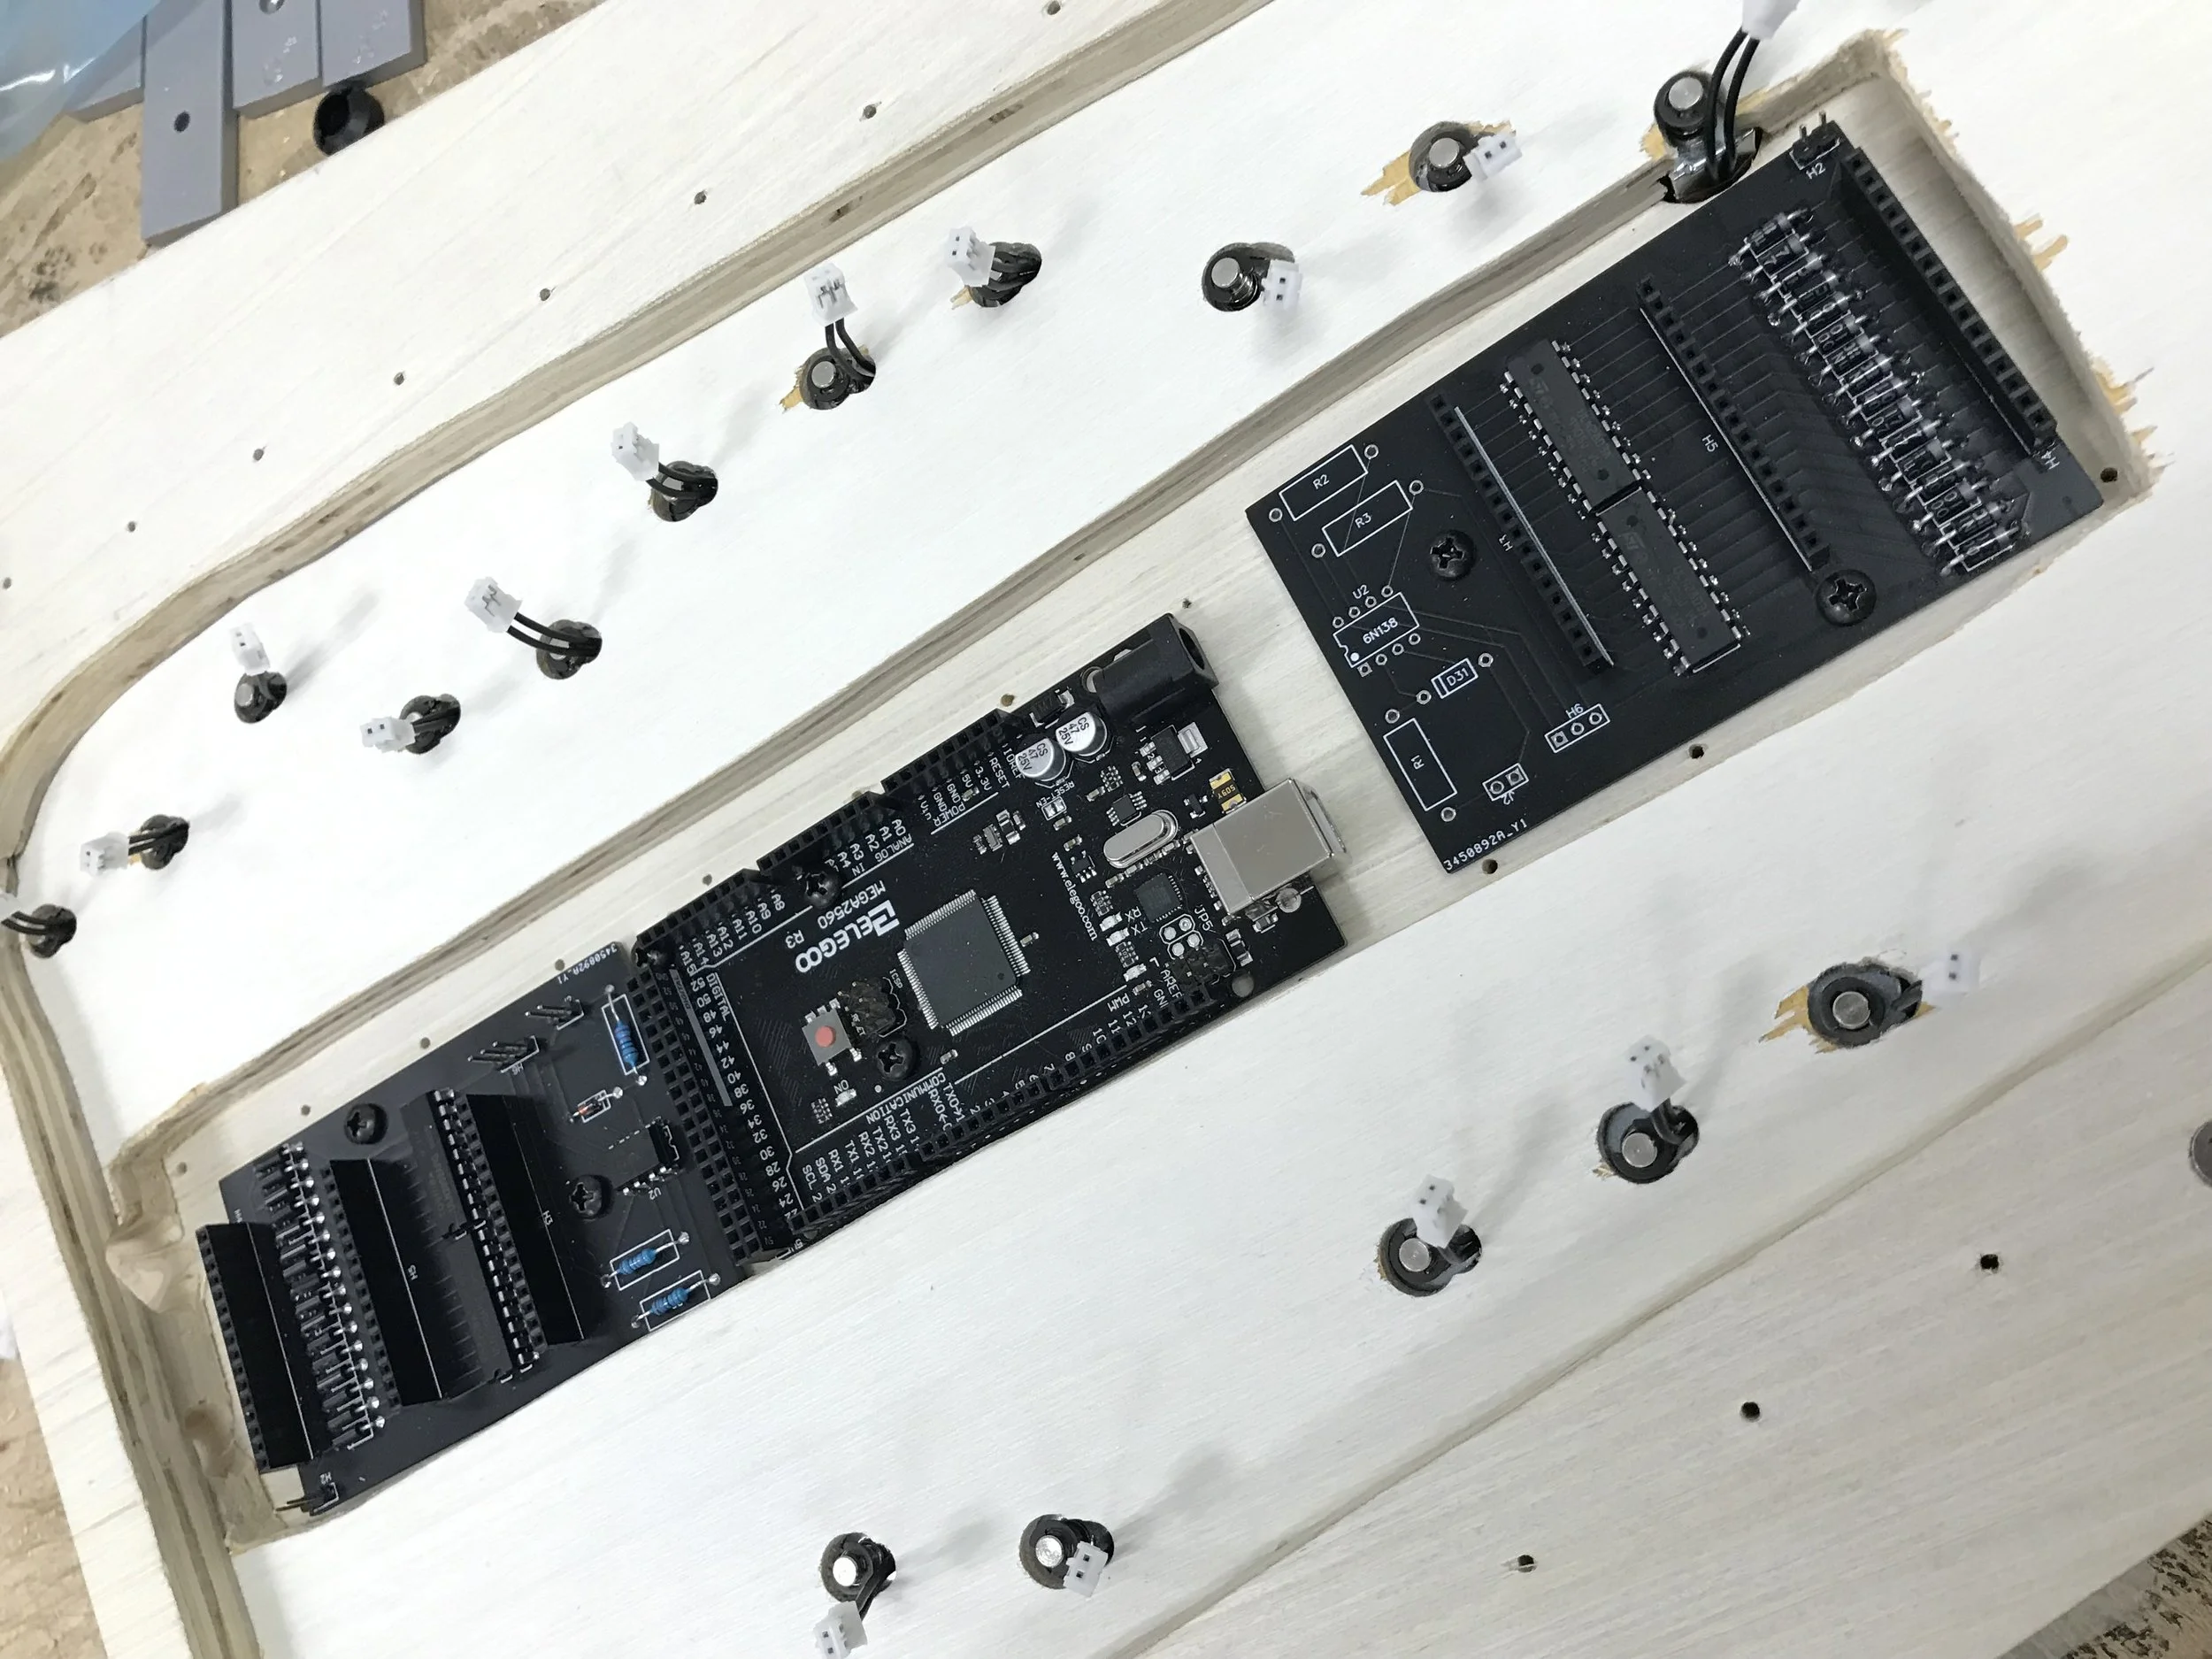
Custom PCB
Striving to make as much as we could from scratch, we designed, ordered, and populated a custom PCB which included the serial data opto-coupler, transistor array chips, and flyback diodes.
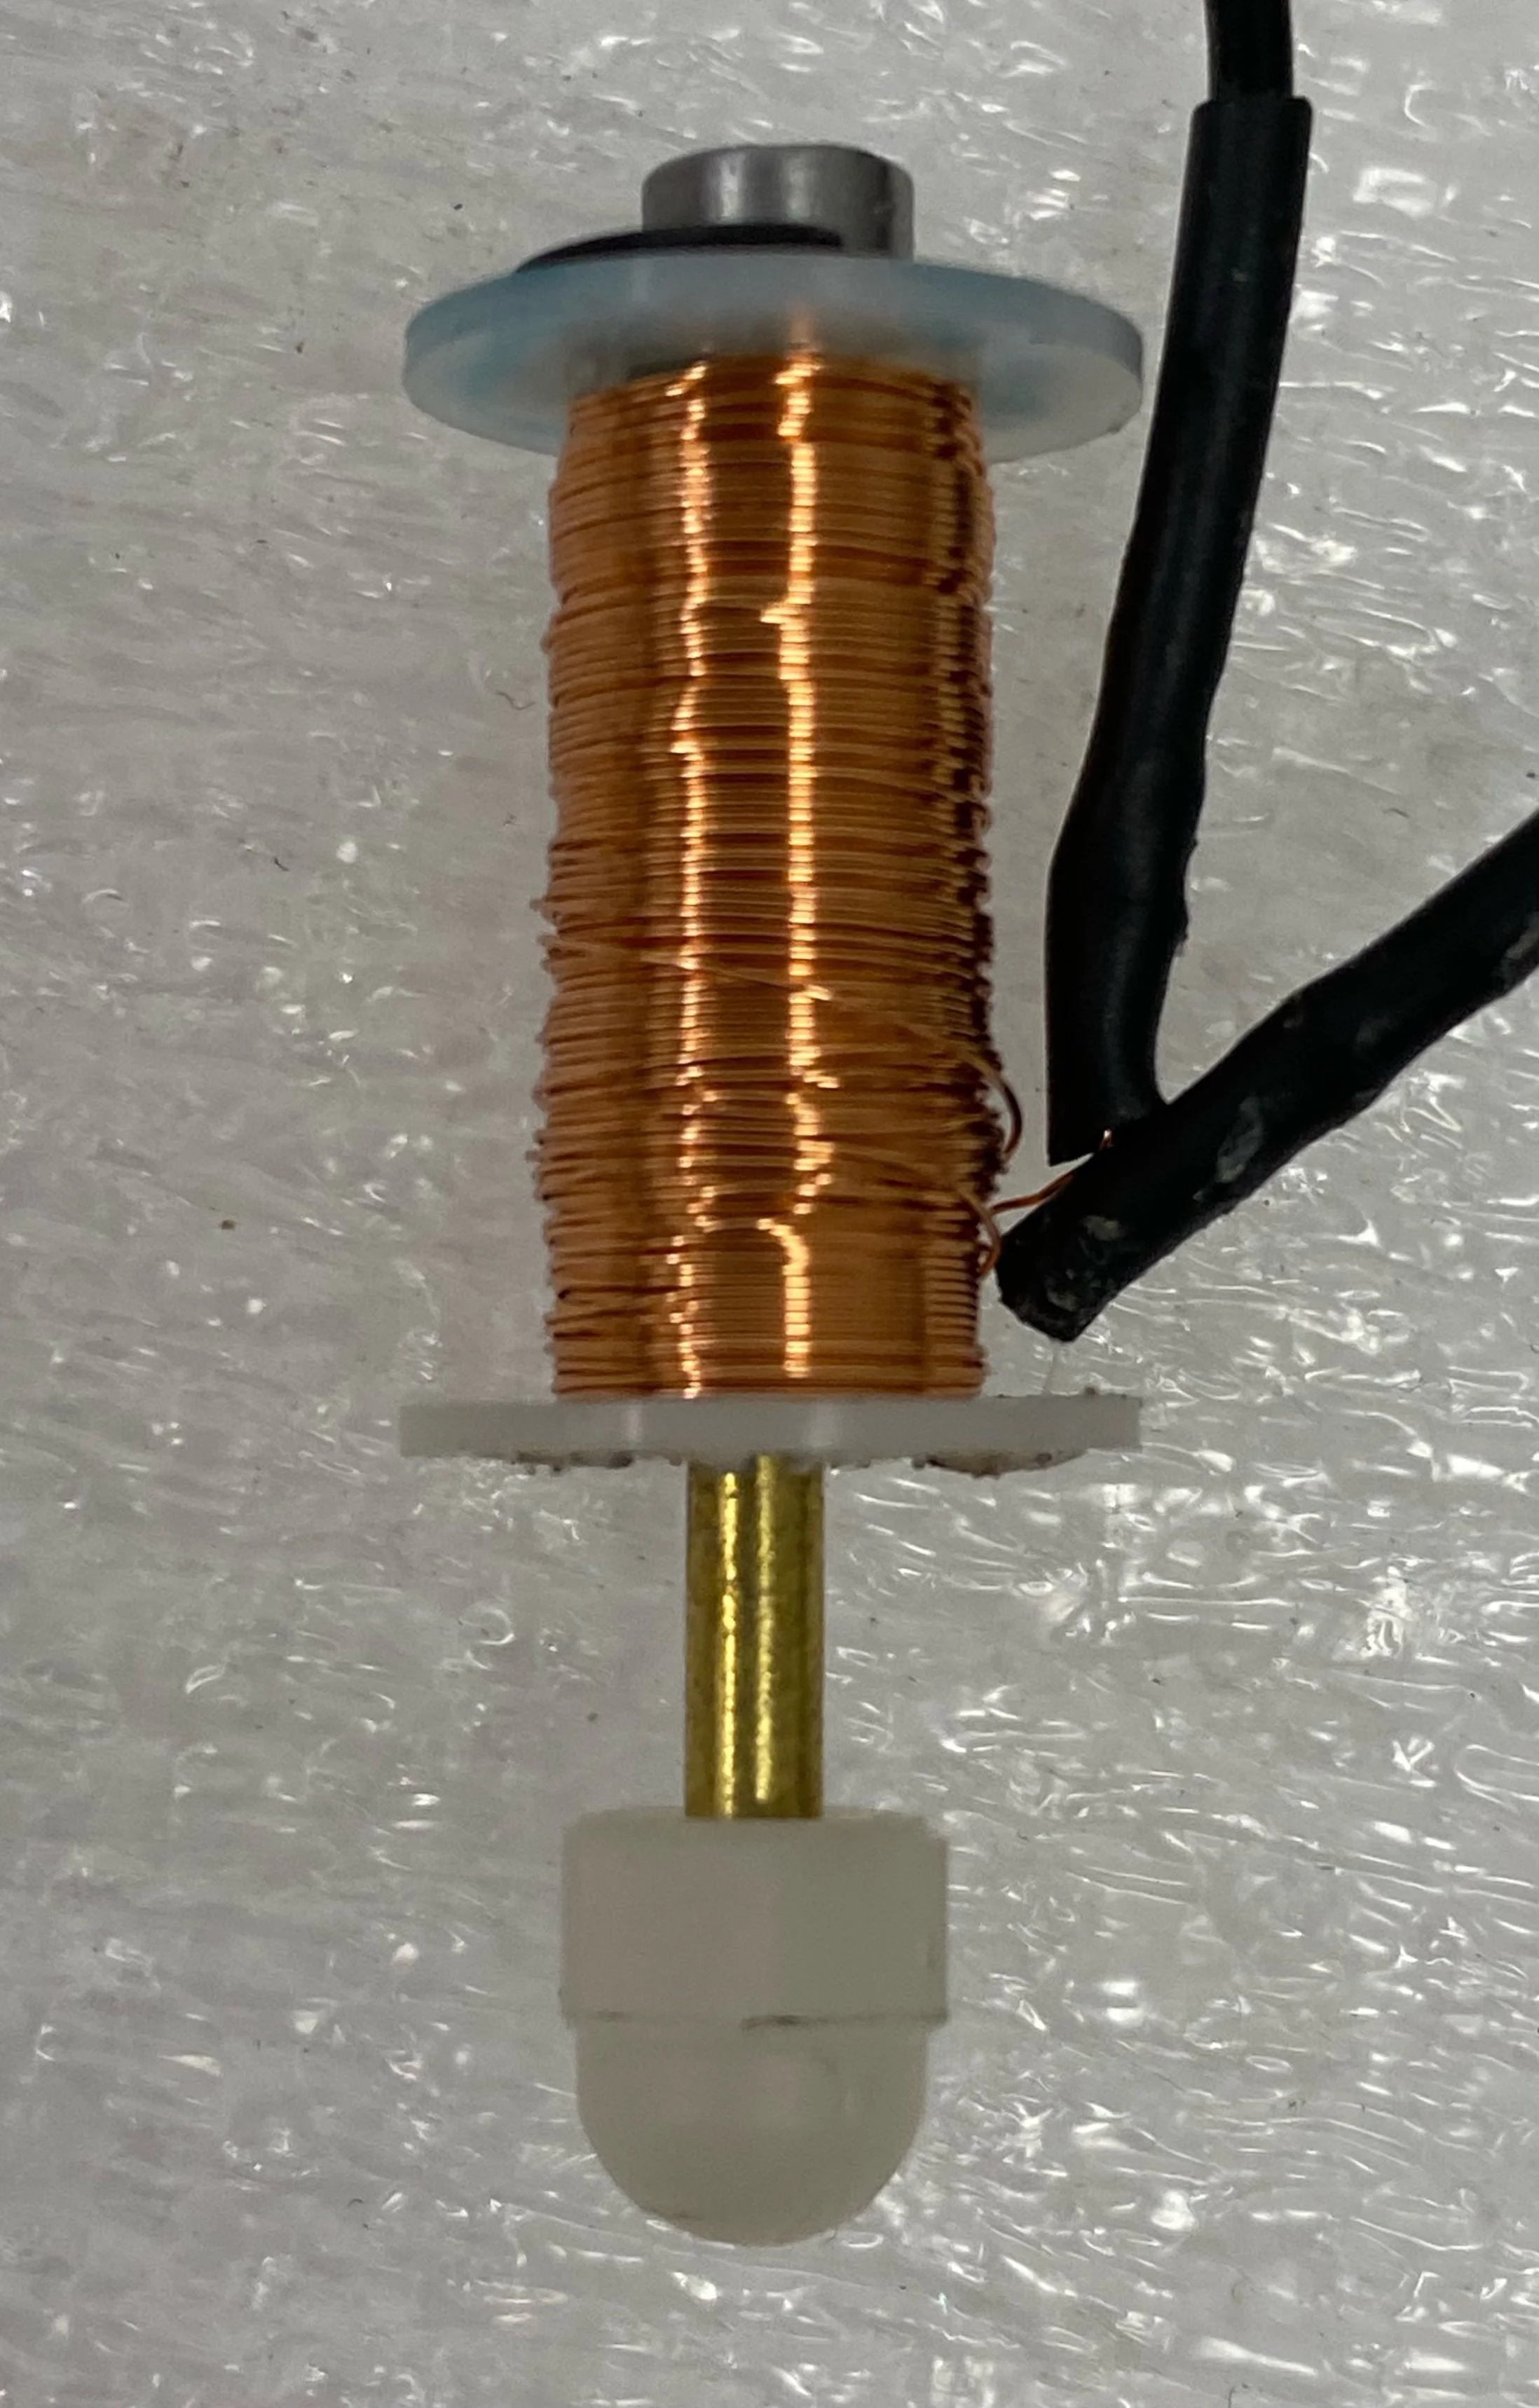
Handmade Solenoid
Going even further off the DIY deep end, I built some prototype solenoids that we could make at scale for the project. The best version was a combination of small gauge copper wire and a very thin barrel to minimize the distance from the coil to the plunger.
Using a lightweight, nonferrous brass tip dramatically improved the solenoid’s performance.
Lessons Learned
Cable Management
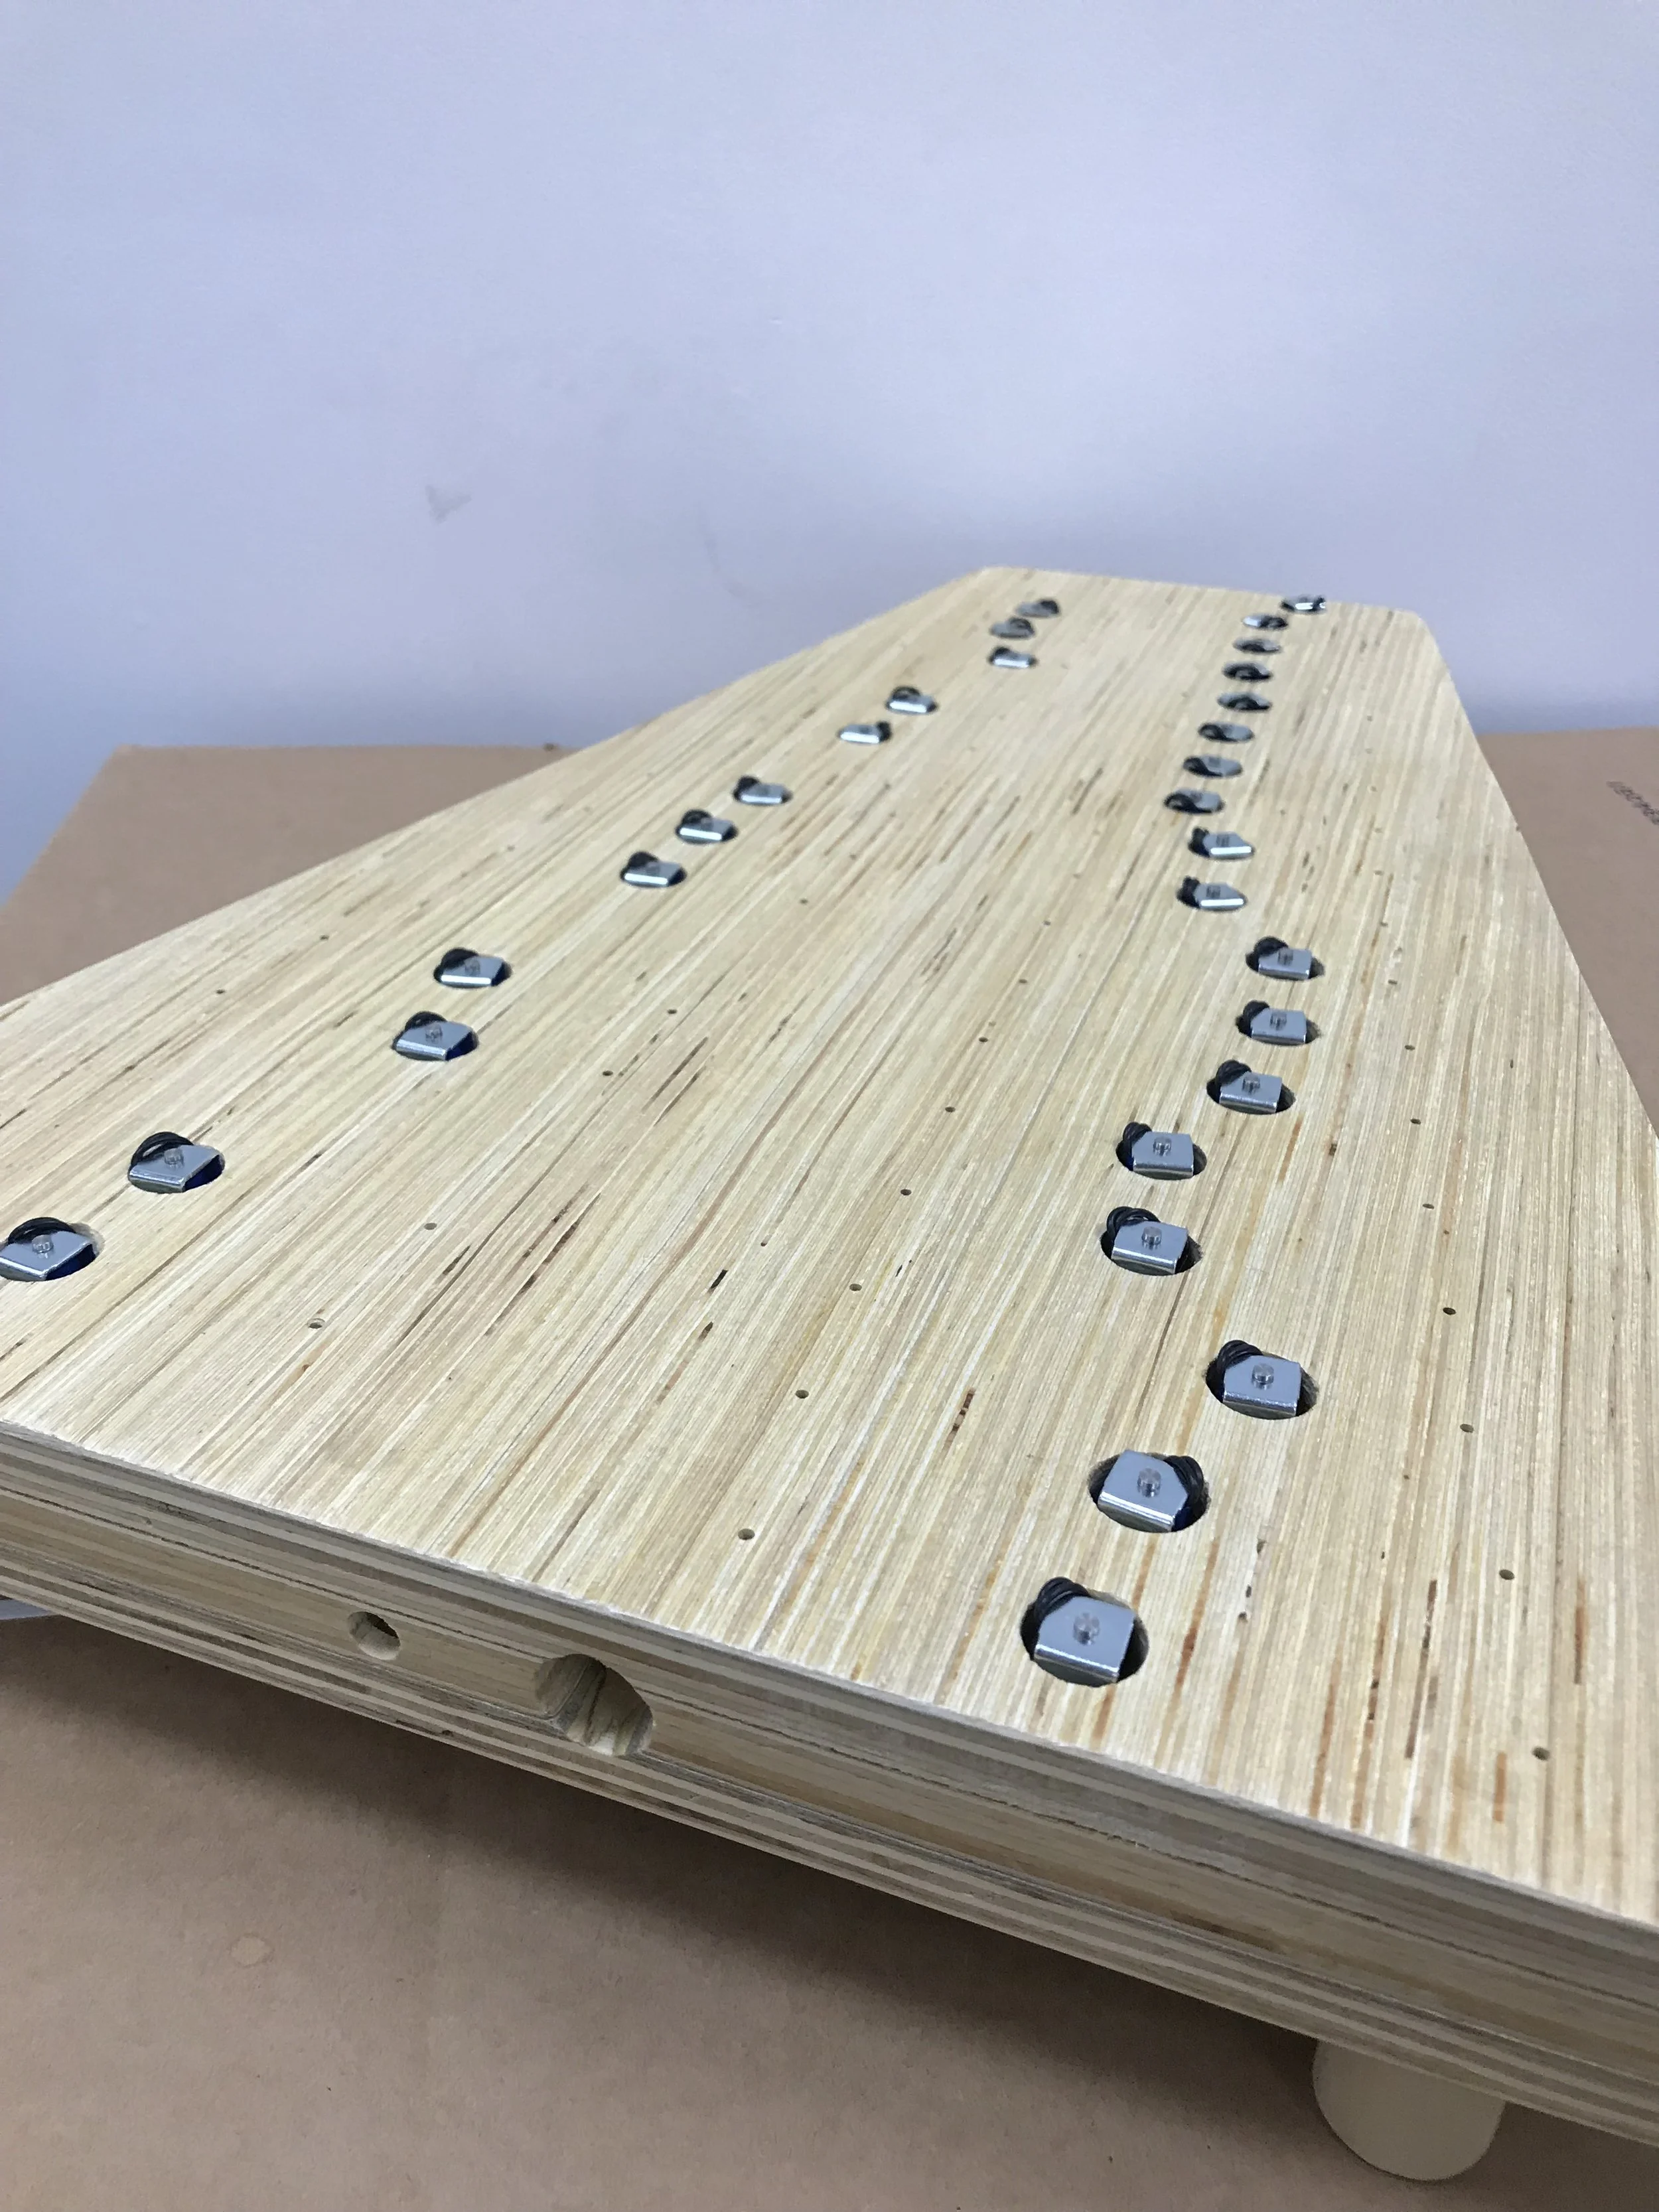
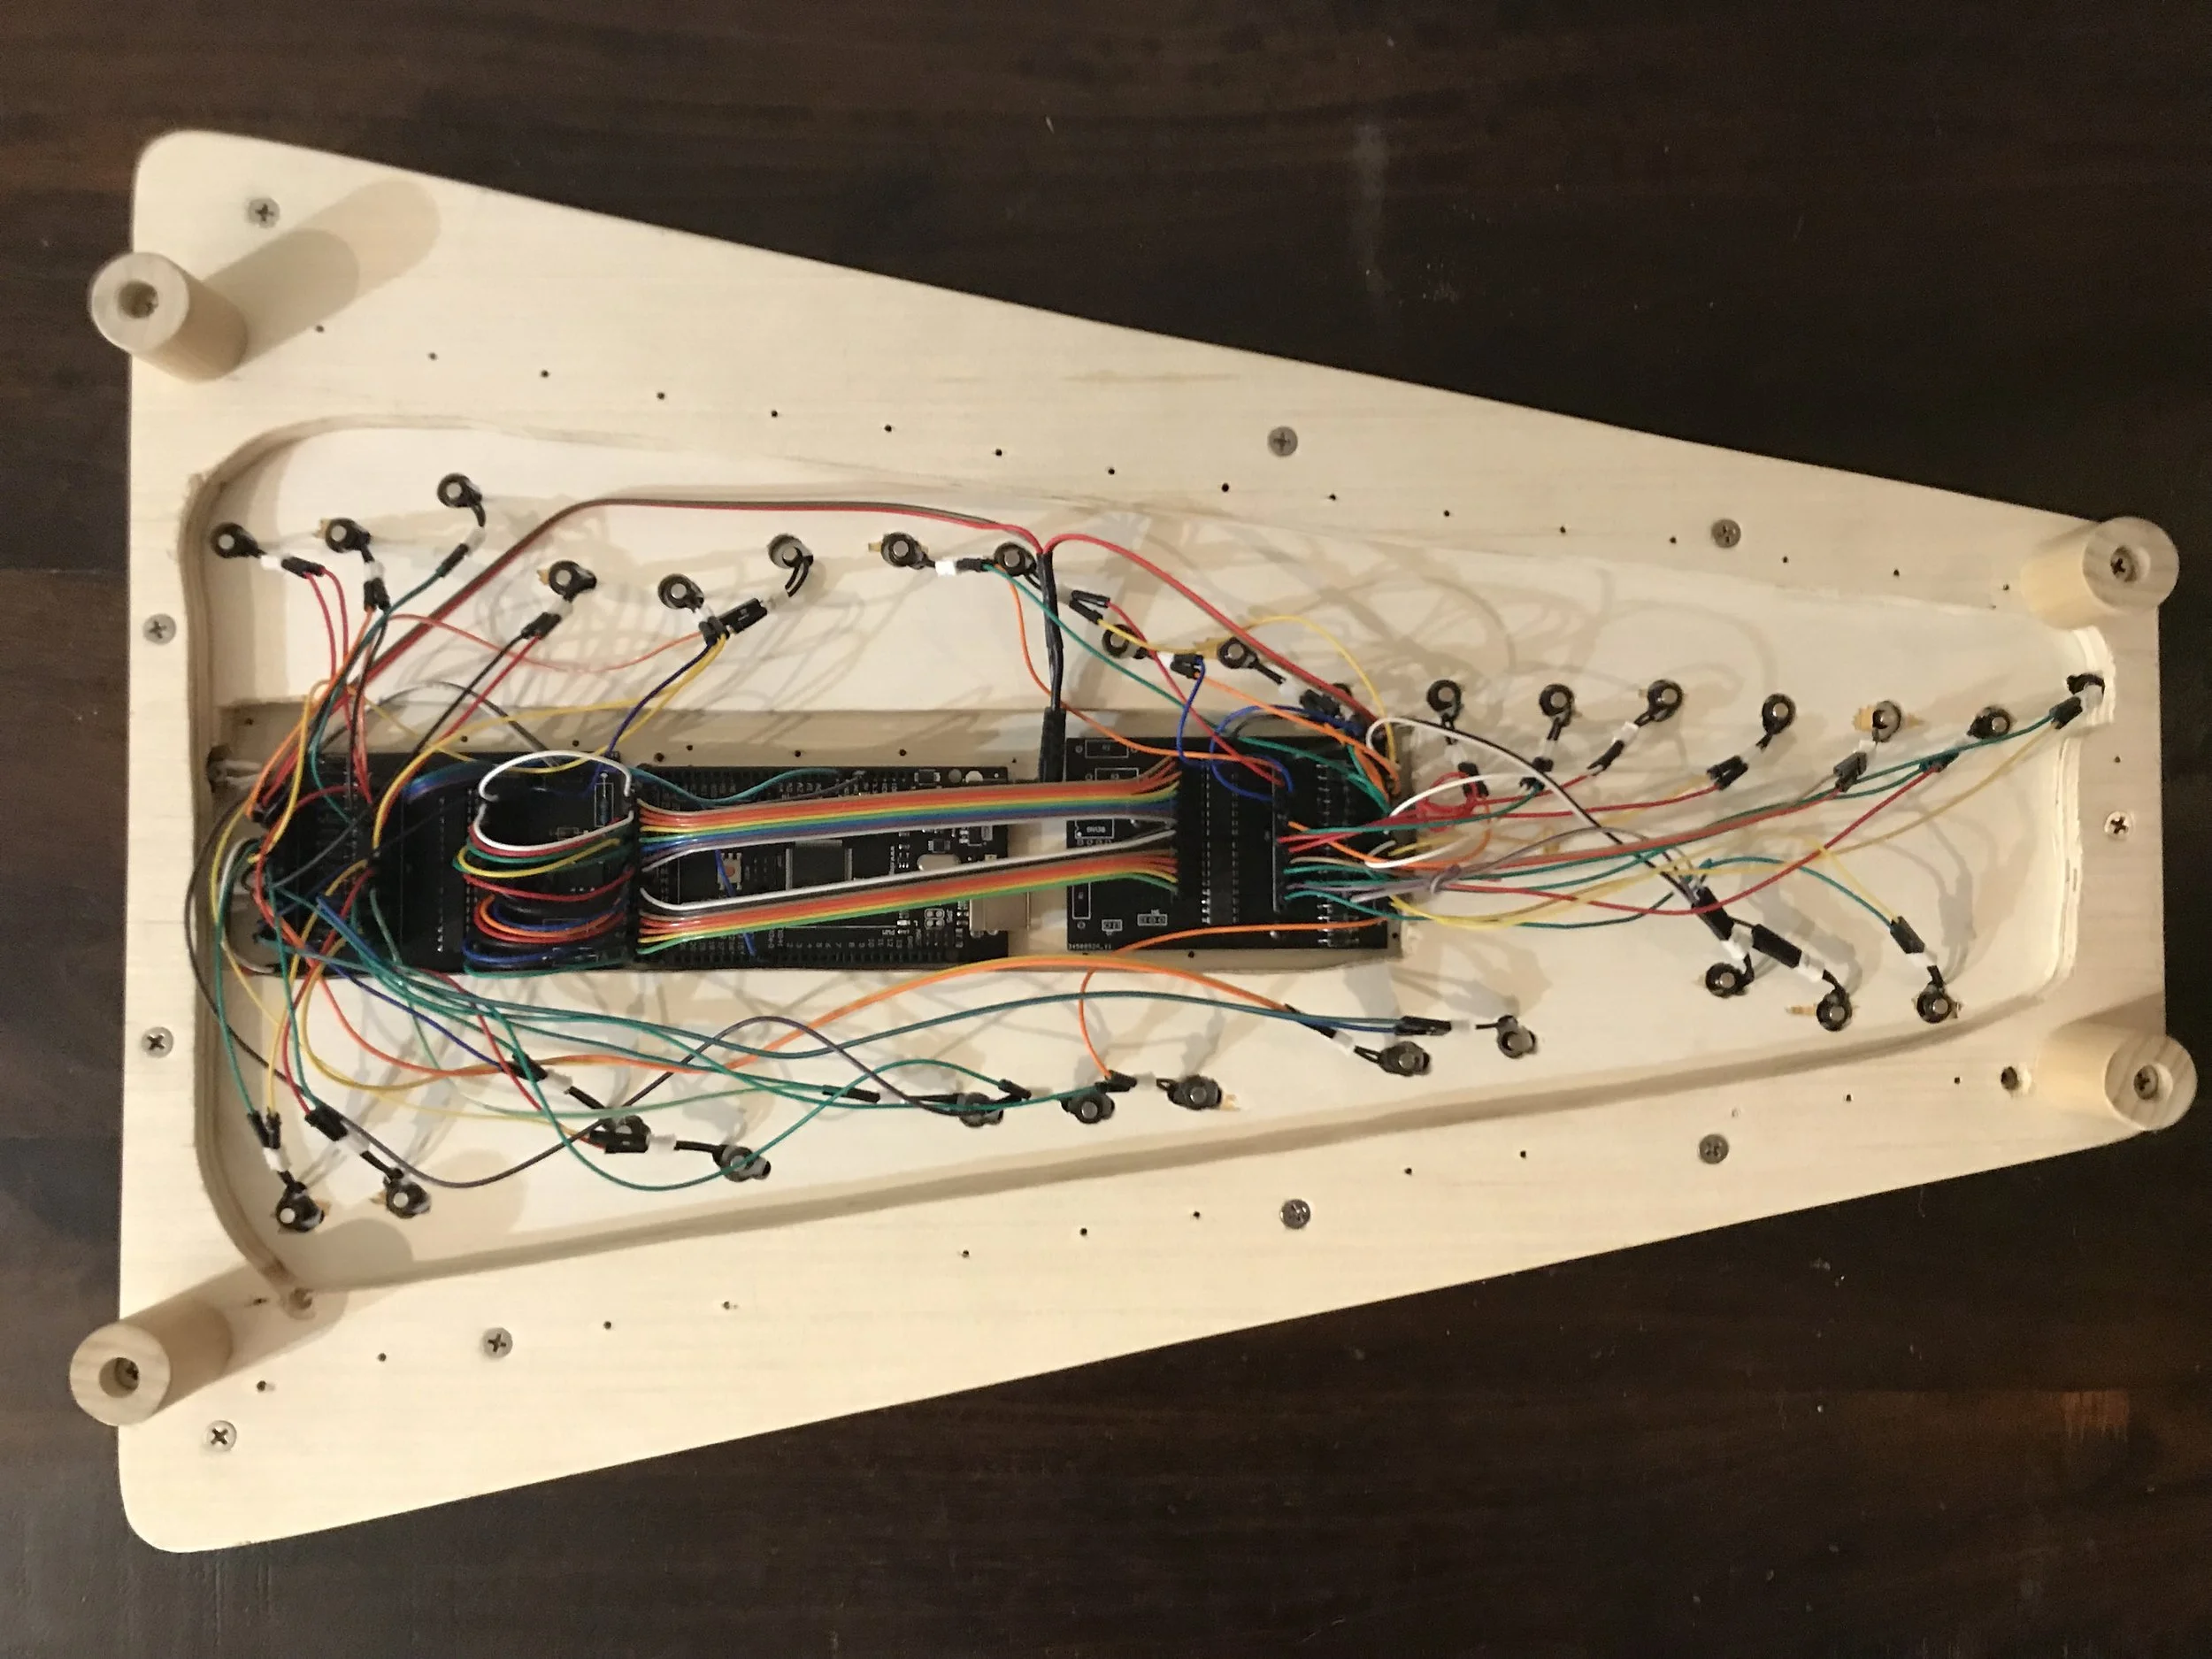
With 30 digital outputs and 60 power connections, the final product was a mess of wires. In retrospect, neater wiring would be worth the extra time.
Volume Control
We were not expecting a lot of power from the mini 5v solenoids, so we did not include a way to dampen the sound of the device. The final product was extremely fast, but also quite loud.
It would be possible to reduce the volume by decreasing the amount of time that the solenoid is powered.
DIY (almost) everything
I spent dozens of hours designing a solenoid we could build from scratch, using different gauges of copper wire, different numbers of turns, and different brass/steel plungers.
We ultimately decided that not every part needed to be made custom for this project.
Here is another demonstration.
Thanks to Nick Roberts and Garrison Arnone for their help on this fun project!